DISASSEMBLY
NOTE: The shock assembly must be removed from the vehicle for it to be disassembled and assembled. (Refer to 2 - SUSPENSION/REAR/SHOCK - REMOVAL)
For the disassembly and assembly of the shock assembly, use Strut Spring Compressor, Pentastar Service Equipment (PSE) tool W-7200, or the equivalent, to compress the coil spring. Follow the manufacturer's instructions closely.
WARNING: Do not remove the shock rod nut before the coil spring is properly compressed. The coil spring is held under pressure. The coil spring must be compressed, removing spring tension from the upper mounting bracket, before the shock rod nut is removed.
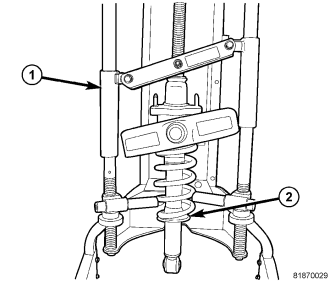
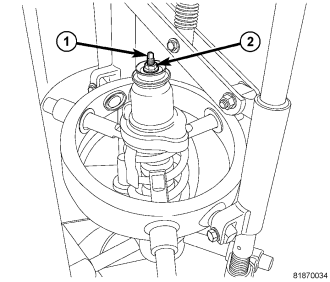
CAUTION: Never use impact or high speed tools to remove the shock rod nut. Damage to the shock internal bearings can occur.
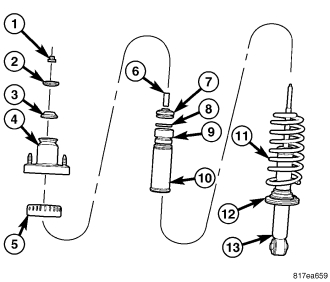
NOTE: If the coil spring needs to be serviced, proceed with the next step, otherwise, proceed with step STEP 11.
- Inspect the shock (13) for shaft binding over the full stroke of the shaft.
- Inspect the jounce bumper (9) for cracks and signs of deterioration.
- Inspect the dust shield (10) for cracks and tears.
- Check the upper mounting bracket (4) for cracks and distortion and its retaining studs for any sign of damage.
- Inspect the upper (3) and lower (7) bushings, for material deterioration and signs of deterioration. Inspect the sleeve (6) for wear and distortion.
- Inspect the upper (5) and lower (12) spring isolators for material deterioration and distortion.
- Inspect the coil spring (11) for any sign of damage to the coating.
NOTE: For reassembly, (Refer to 2 - SUSPENSION/REAR/SHOCK - ASSEMBLY)